

Factorial Code Forms Customization
Default Behavior
Section titled “Default Behavior”When you set only the team and processId, Factorial Code Forms exhibit the following default behavior:
- The form initiates the process execution.
- A loading overlay is displayed during execution with the message: “Sending information…”
- Upon success:
- The response object is logged in the JavaScript console.
- The form is replaced by the message: “The form has been successfully submitted.”
- Upon error:
- The response object is logged in the JavaScript error console.
- The form is replaced by the message: “There has been an error submitting the form.”
These behaviors can be extended with the following configurations:
Add Success or Error Callback Functions
Section titled “Add Success or Error Callback Functions”You can provide functions to manage the process execution response. This is powerful, allowing actions like retrieving records from a database and showing them to the user.
The syntax for setting these functions in each approach would be:
<div data-fcode-form-team="<fcode-team-slug>" data-fcode-form-process="<fcode-process-slug>" data-fcode-form-on-success="(optional) HANDLER_FUNCTION_NAME" data-fcode-form-on-next-step="(optional) HANDLER_FUNCTION_NAME" data-fcode-form-on-error="(optional) HANDLER_FUNCTION_NAME"></div>Provide a globally available JavaScript function (called with window.${functionName}), that receives the generated formId, and the JSON result of the started execution. For example:
<script> window.manageOutput = (formId, jsonResponse) => { document.getElementById("output").innerHTML = JSON.stringify( jsonResponse, 2, null ); };</script>The same approach works for the success, next-step and error callbacks.
Simplified syntax to directly provide functions:
<div id="my-fcode-form"></div><script> Fcode.initForm("#my-fcode-form", { team: "<fcode-team-slug>", process: "<fcode-process-slug>", onSuccess: (formId, processExecutionResult, formSubmittedData) => { console.log(`Form ${formId} has been successfully submitted.`); console.log(`Sent form data was:`, formSubmittedData); console.log(`Received response was:`, processExecutionResult); }, onError: (formId, error, formSubmittedData) => { console.error(`Form ${formId} submission failed`); console.error(`Sent form data was:`, formSubmittedData); console.error(`Received error was:`, error); }, });</script>Similar syntax to the JavaScript function:
import FcodeForm from "@factorialco/fcode-react-forms";
const MyComponent = () => {  return (    <FcodeForm      team={"<fcode-team-slug>"}      processId={"<fcode-process-slug>"}      onSuccess={(formId, processExecutionResult, formSubmittedData) => {        console.log(`Form ${formId} has been successfully submitted.`);        console.log(`Sent form data was:`, formSubmittedData);        console.log(`Received response was:`, processExecutionResult);      }}      onError={console.error}    />  );};
Default Behaviors Using Response Information
Section titled “Default Behaviors Using Response Information”We have implemented several default behaviours to handle the most common use cases:
Show a Success Message from Process Execution
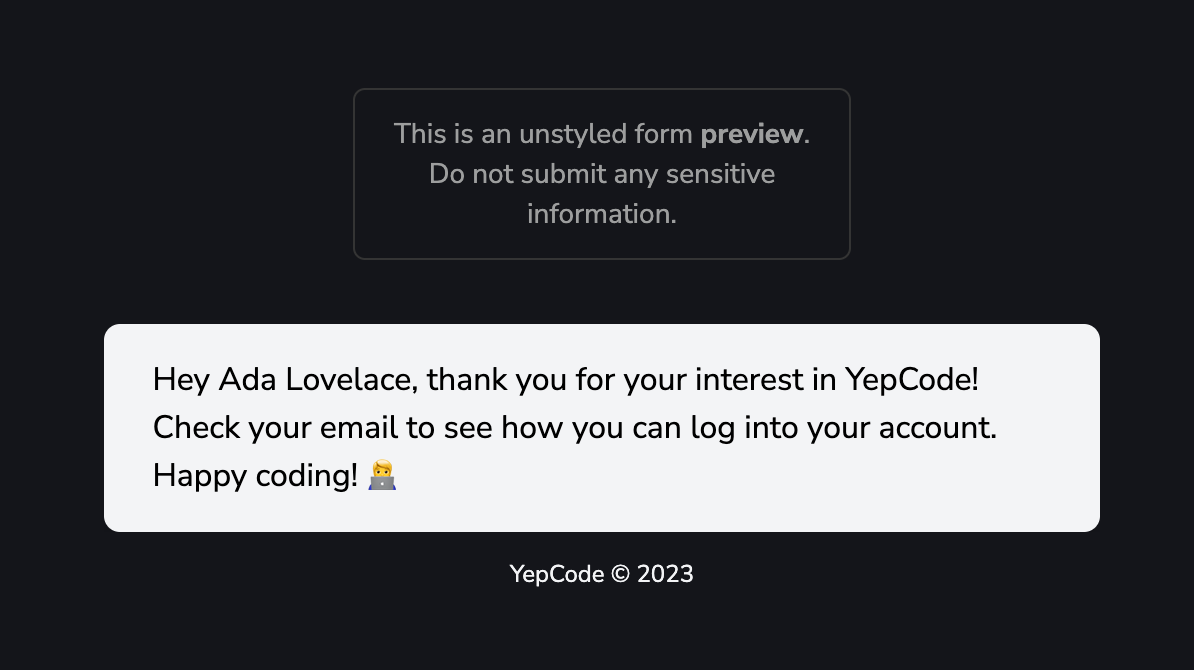
Section titled “Show a Success Message from Process Execution”If your process execution returns a JSON containing a message attribute, written in
markdown, …
The message supports GitHub Flavored Markdown:
headings, links, images, lists, code blocks and — most usefully for showing
execution results — tables. The same applies to the error message
(errorMessage) and to the markdown.before/after blocks in a form schema.
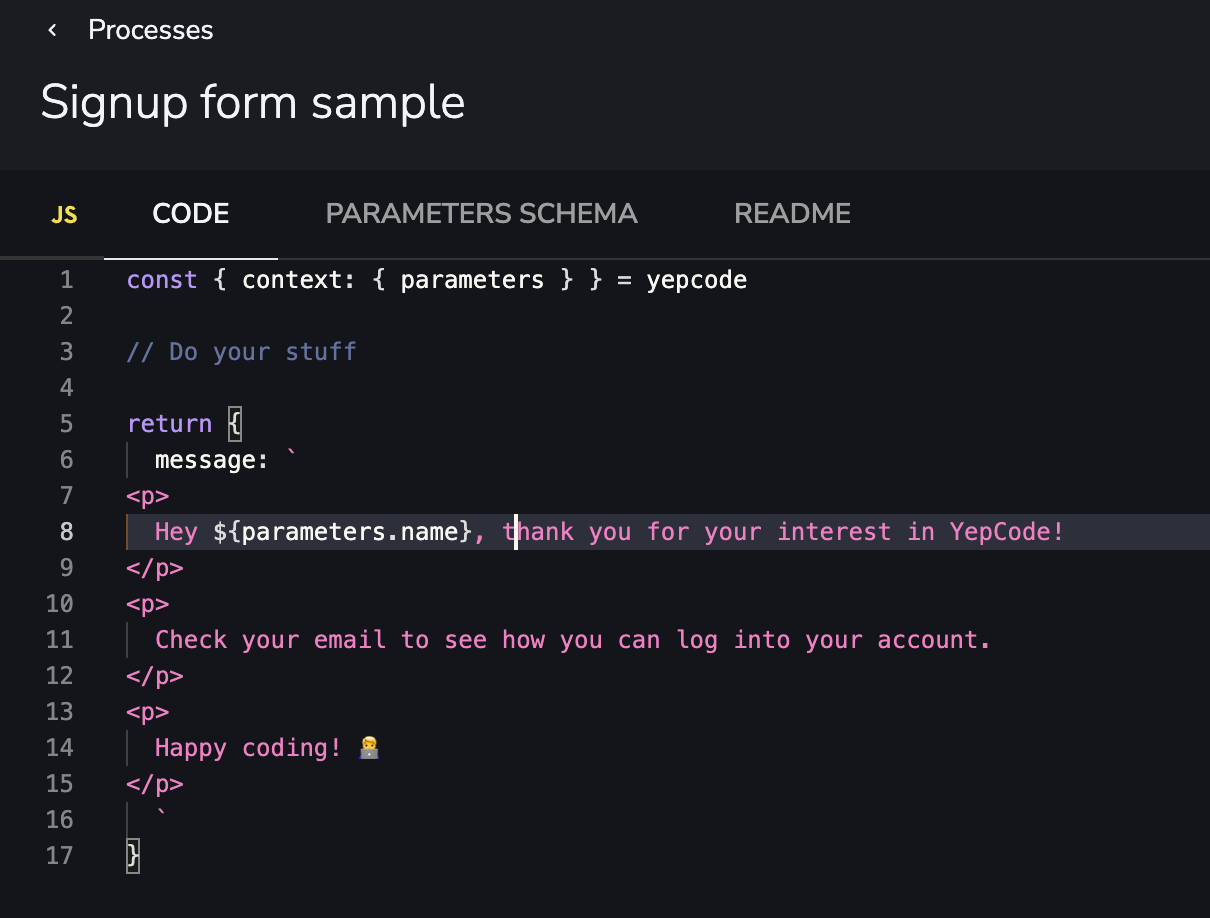
… it will be used if form submission was successfull:
Show Inline Error Messages
Section titled “Show Inline Error Messages”Include validation errors related to the global form or specific fields. These errors are attached to the default ones that our validator already includes.
For example, if you have this form schema specification:
{ "type": "object", "title": "", "properties": { "email": { "type": "string", "title": "Your email" }, "phone": { "type": "object", "title": "Your phone contact", "properties": { "countryCode": { "title": "Country code", "type": "string" }, "number": { "title": "Number", "type": "string" } } } }}And in your process execution return an error response that includes a formErrors object:
return { status: 400, body: { formErrors: { fields: { email: "Some validation error in email.", phone: { countryCode: "Some validation error in country code.", }, }, global: ["One global error.", "Other global error."], }, },};It will be shown in the form as a validation error:
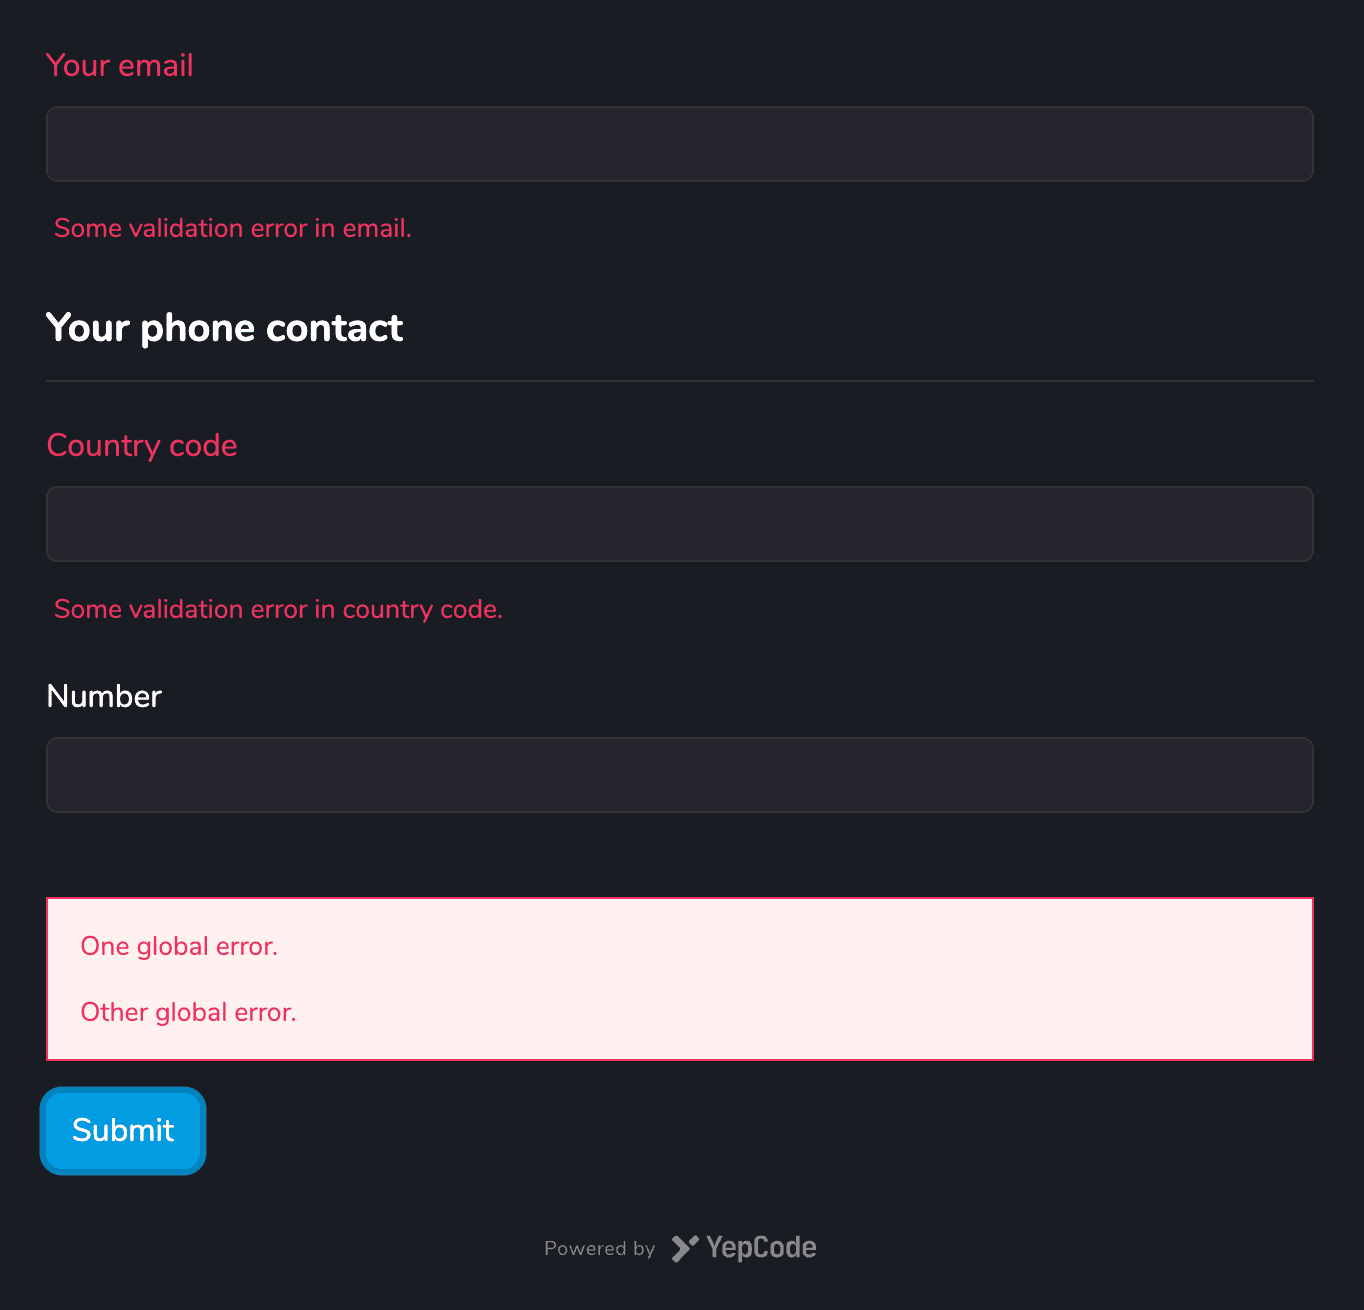
Redirect to Any URL
Section titled “Redirect to Any URL”If your process execution returns a JSON containing a redirect object with url and optionally timeout (milliseconds), the user will be redirected to that page after form submission:
return { redirect: { url: "https://google.com", timeout: 2000, },};The URL must be http(s); a relative path resolves against the page hosting the form. Any other scheme is ignored with a console warning. The redirect is followed even when the embedder handles onSuccess, so it also works for forms on the Factorial marketplace — there, install and uninstall forms record the installation first and then navigate, so a redirecting form should set a timeout if it also wants its message read.
Add Initial Form Values
Section titled “Add Initial Form Values”Provide a JSON object that will be used to set initial values in the form. Particularlly useful for setting hidden fields values.
The syntax for setting these defaults in each approach would be:
<div data-fcode-form-team="<fcode-team-slug>" data-fcode-form-process="<fcode-process-slug>" data-fcode-form-default-values='{ "company": "Factorial Code", "oneHiddenField": "the-value" }'></div><div id="my-fcode-form"></div><script> Fcode.initForm("#my-fcode-form", { team: "<fcode-team-slug>", process: "<fcode-process-slug>", defaultValues: { company: "Factorial Code", oneHiddenField: "the-value", }, });</script>import FcodeForm from "@factorialco/fcode-react-forms";
const MyComponent = () => { return ( <FcodeForm team={"<fcode-team-slug>"} processId={"<fcode-process-slug>"} defaultValues={{ company: "Factorial Code", oneHiddenField: "the-value", }} /> );};Configuring Factorial Code Sync or Async Process Execution
Section titled “Configuring Factorial Code Sync or Async Process Execution”By default, all process executions are synchronous. However, for long-time executions, consider starting them asynchronously. Factorial Code will respond instantly with a 201 HTTP code and a JSON object containing the execution ID.
To set these default values, use the following syntax for each approach:
<div data-fcode-form-team="<fcode-team-slug>" data-fcode-form-process="<fcode-process-slug>" data-fcode-form-async="true"></div><div id="my-fcode-form"></div><script> Fcode.initForm("#my-fcode-form", { team: "<fcode-team-slug>", process: "<fcode-process-slug>", async: true, });</script>import FcodeForm from "@factorialco/fcode-react-forms";
const MyComponent = () => { return ( <FcodeForm team={"<fcode-team-slug>"} processId={"<fcode-process-slug>"} async={true} /> );};Pinning a form to a process version
Section titled “Pinning a form to a process version”By default an embedded form always runs the current version of the process. To pin it to a published process version, pass the version tag. A version alias works too, which lets you move every embed to a new version by repointing the alias, without editing the embedded page.
The version applies to both requests the form makes: loading the form definition and submitting it.
In a multi-step form it carries over to every step. A step result names the next process but not a version for it, so the version you pinned is the only intent available — and it is usually what you want, since the steps of one flow are normally released together. A step whose process has no such version runs its current version.
The process dashboard writes this for you: enable forms, pick a version in the selector next to the embed code, and copy the generated snippet.
<div data-fcode-form-team="<fcode-team-slug>" data-fcode-form-process="<fcode-process-slug>" data-fcode-form-process-version="v1.0.0"></div><div id="my-fcode-form"></div><script> Fcode.initForm("#my-fcode-form", { team: "<fcode-team-slug>", process: "<fcode-process-slug>", processVersion: "v1.0.0", });</script>import FcodeForm from "@factorialco/fcode-react-forms";
const MyComponent = () => { return ( <FcodeForm team={"<fcode-team-slug>"} processId={"<fcode-process-slug>"} processVersion={"v1.0.0"} /> );};Adding headers to form submissions
Section titled “Adding headers to form submissions”In the same way we support headers on webhooks, we support headers on forms, specially interesting for the initiated by header.
To set these form headers, use the following syntax for each approach:
<div data-fcode-form-headers='{"my-custom-header": "foo"}' data-fcode-form-team="<fcode-team-slug>" data-fcode-form-process="<fcode-process-slug>"></div><div id="my-fcode-form"></div><script> Fcode.initForm("#my-fcode-form", { team: "<fcode-team-slug>", process: "<fcode-process-slug>", headers: {"my-custom-header": "foo"}, });</script>import FcodeForm from "@factorialco/fcode-react-forms";
const MyComponent = () => { return ( <FcodeForm team={"<fcode-team-slug>"} processId={"<fcode-process-slug>"} headers={{"my-custom-header": "foo"}} /> );};Override the API host
Section titled “Override the API host”By default the form embed talks to https://code.factorialhr.com/platform. You can point it at a different backend (for example, a server running fcode http when migrating from Factorial Code Cloud) by setting the host URL.
<div data-fcode-form-team="<fcode-team-slug>" data-fcode-form-process="<fcode-process-slug>" data-fcode-form-host-url="https://your-host"></div><div id="my-fcode-form"></div><script> Fcode.initForm("#my-fcode-form", { team: "<fcode-team-slug>", process: "<fcode-process-slug>", hostUrl: "https://your-host", });</script>import FcodeForm from "@factorialco/fcode-react-forms";
const MyComponent = () => { return ( <FcodeForm team={"<fcode-team-slug>"} processId={"<fcode-process-slug>"} hostUrl={"https://your-host"} /> );};Additional Options
Section titled “Additional Options”Factorial Code Forms support additional configuration using a JSON object called options. This object can be configured in the embedded script or function, or in the JSON Schema specification:
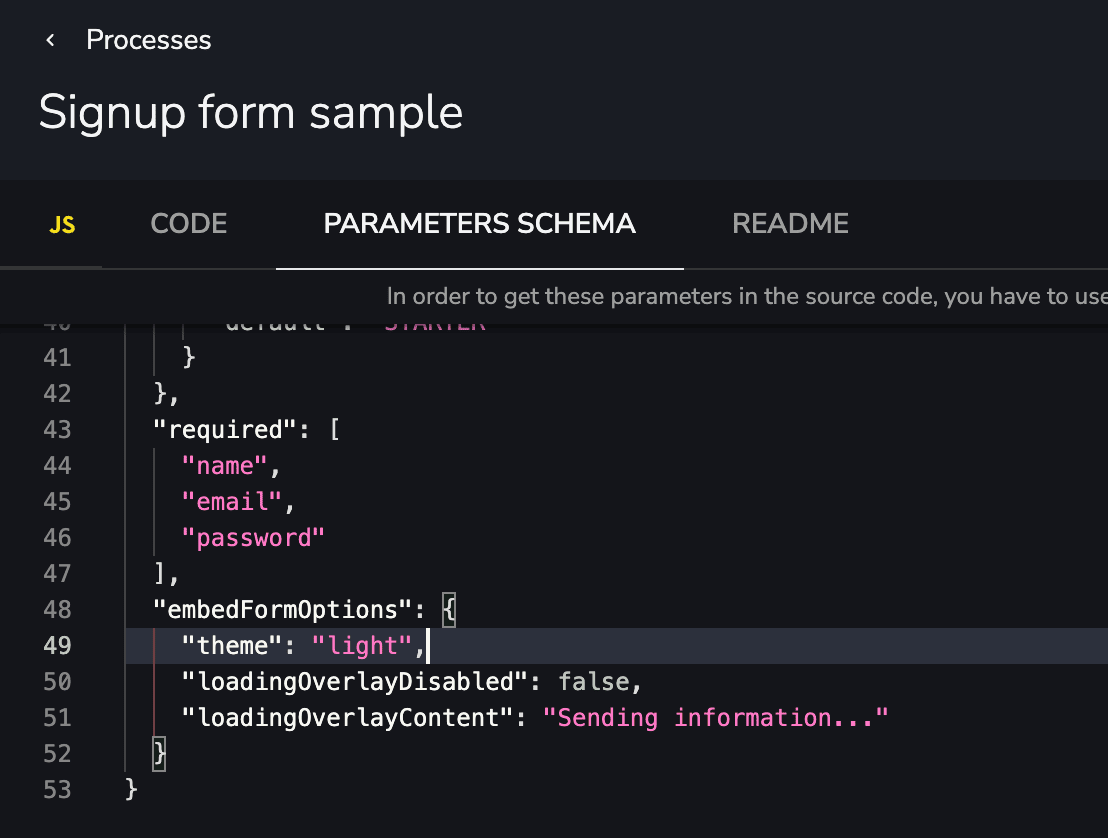
<div data-fcode-form-team="<fcode-team-slug>" data-fcode-form-process="<fcode-process-slug>" data-fcode-form-options=' { "theme": "light (default)", "loadingOverlayDisabled": false, "loadingOverlayContent": "Sending information...", "loadingContent": "Loading form...", }'></div><div id="my-fcode-form"></div><script> Fcode.initForm("#my-fcode-form", { team: "<fcode-team-slug>", process: "<fcode-process-slug>", options: { theme: "light (default)", loadingOverlayDisabled: false, loadingOverlayContent: "Sending information...", loadingContent: "Loading form...", }, });</script>import FcodeForm from "@factorialco/fcode-react-forms";
const MyComponent = () => { return ( <FcodeForm team={"<fcode-team-slug>"} processId={"<fcode-process-slug>"} options={{ theme: "light (default)", loadingOverlayDisabled: false, loadingOverlayContent: "Sending information...", loadingContent: "Loading form...", }} /> );};Consider that this configuration will impact all instances of this embedded form. If you need to override specific settings for a particular embed, utilize the following approaches, as they take precedence over the configuration received from the platform.
Appearance Configuration
Section titled “Appearance Configuration”Factorial Code Forms support several appearance configurations to align with your site’s styles.
This configuration must be provided using the options object and allows you to change various appearance details:
- Theme & styles configuration
- Disable the loading overlay
- Change the loading overlay text message
- Change the message shown while the form is loading
{ "theme": "light (default)", "loadingOverlayDisabled": false, "loadingOverlayContent": "Sending information...", "loadingContent": "Loading form..."}Themes and Styles
Section titled “Themes and Styles”Factorial Code Forms include one out-of-the-box theme, defined using a CSS variables file:
- Light theme (https://code.factorialhr.com/sdk/styles-theme-light.css)
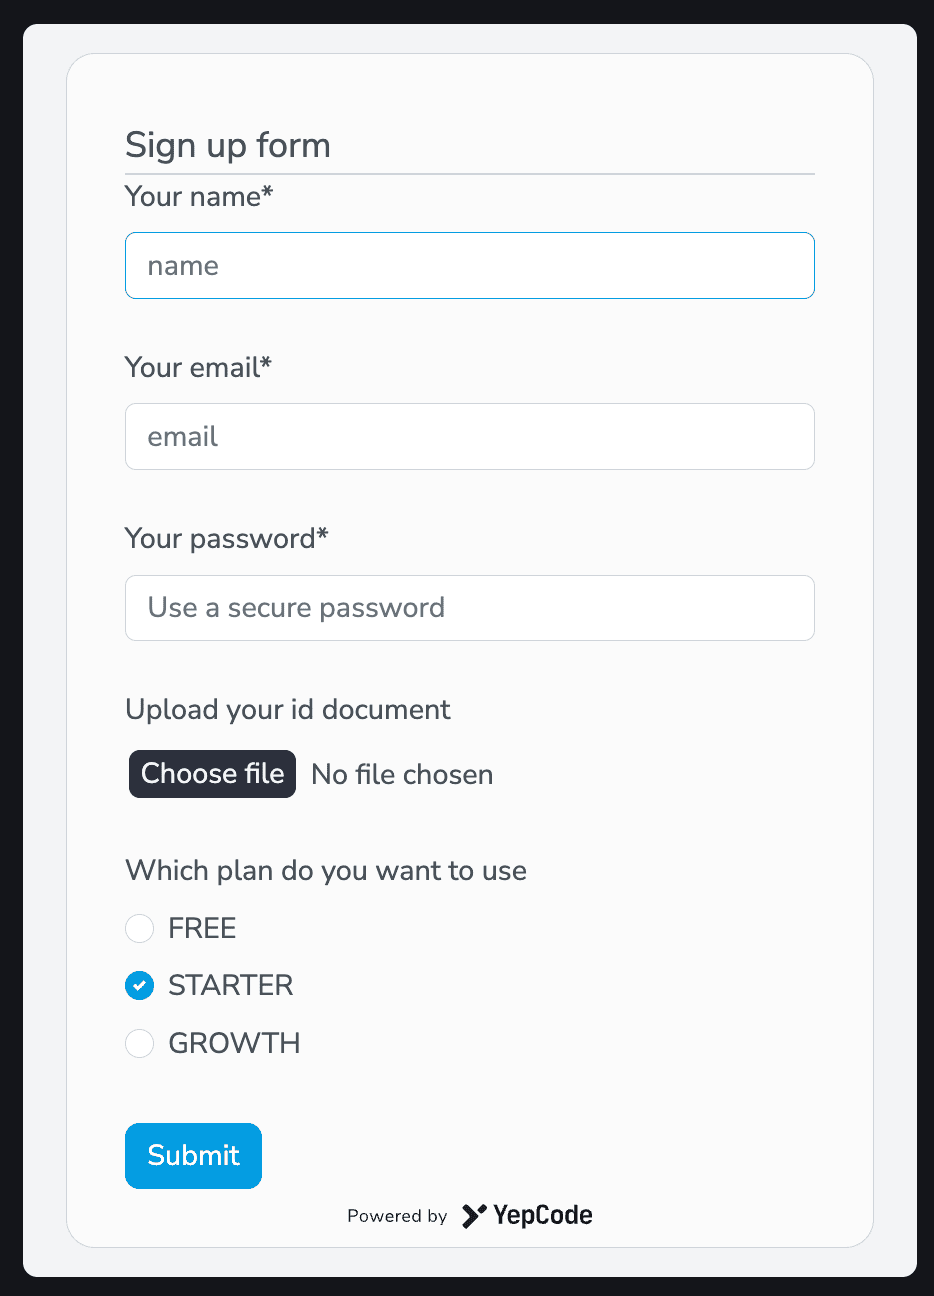
You can create a new theme by extending this CSS file and setting the embedFormOptions configuration themeStylesheet, for example:
"embedFormOptions": { "themeStylesheet": "https://code.factorialhr.com/sdk/styles-theme-custom.css"},Another alternative is to provide the CSS rules directly into the themeStylesheet option:
"embedFormOptions": { "themeStylesheet": ":root {\n--ycf-accent-color: #05e20c;\n--ycf-accent-color-darker: #be0493;}" }For adding the same form in several pages, provide a custom class name using the form options:
"embedFormOptions": { "className": "white-background-form" }Using JSON Schema for Appearance Tunning
Section titled “Using JSON Schema for Appearance Tunning”Factorial Code Forms are rendered using react-jsonschema-form so all the UI schema configuration from this library, is available for use.
To provide greater flexibility to the forms and the content they render (titles, descriptions, help messages), we have enhanced and extended them to support markdown. Read more about this in Factorial Code parameters.”
For example, to change the submit button text, add this node in your parameters schema:
"ui": { "ui:submitButtonOptions": { "submitText": "Click me!" }}The ui node is also where a form declares its visual steps, via ui:steps — see multi-step forms. In a stepped form, ui:submitButtonOptions applies to the last step’s button (the one that actually submits); the intermediate “Next” and “Back” labels come from ui:steps.config.nextLabel and ui:steps.config.backLabel.
Connecting an external account (OAuth)
Section titled “Connecting an external account (OAuth)”A form can ask the user to connect a third-party account — Slack, Google, Jira… — before it is submitted. Declare a string or boolean property with "ui:widget": "oauth": the form renders a Connect button that opens the provider’s authorization page in a small popup window, waits for the flow to finish, closes the popup and reacts on the form.
{ "title": "Connect your Slack workspace", "type": "object", "preRenderProcess": "slack-prerender", "properties": { "slackConnection": { "title": "Slack workspace", "description": "You will be asked to authorize Factorial in a new window.", "type": "string", "ui": { "ui:widget": "oauth", "ui:options": { "authorizationUrl": { "$ref": "#/variables/slackAuthorizeUrl" }, "connectLabel": "Connect Slack", "connectedLabel": "Slack connected", "onComplete": "submit" } } } }, "required": ["slackConnection"]}The property’s title and description are the message shown around the button (markdown, as everywhere else; use markdown.before / markdown.after for longer copy). The ui:options are:
| Option | Default | Purpose |
|---|---|---|
authorizationUrl | — | The provider’s authorization URL, client_id, redirect_uri, scope and state included. Required; an invalid URL disables the button and logs a warning. |
connectLabel / connectedLabel / pendingLabel | Connect / Connected / Waiting for authorization… | The button text before, after and during the flow. |
onComplete | none | What the form does once connected: none, submit or reload (see below). |
popup | { "width": 600, "height": 700 } | Size of the popup, centred on the page. |
closeDelay | 3000 | Milliseconds the popup stays open after the flow finished, so the user sees the provider’s confirmation. |
The value of the field. When the flow succeeds a boolean property becomes true and a string property takes the value your callback handed back (a connection id, an account handle — an opaque reference, never a token: it reaches the browser and travels in the submission). Until then the field is empty, so marking it required keeps the form from being submitted before the account is connected. For an object property, use "ui:field": "oauth" instead of ui:widget; it takes every parameter the callback handed back.
Finishing the flow: the callback contract. Start the flow with fcode.oauth.start(), which returns the URL to put behind the button. The platform holds the one redirect URI your provider has registered, and when the provider redirects back it runs the process you named in onComplete — no public webhook, no state to mint or verify, and the PKCE verifier already in the parameters. The process exchanges the code for tokens, stores them, and ends by redirecting the popup to the Forms SDK’s callback page:
return { status: 302, headers: { Location: 'https://code.factorialhr.com/sdk/oauth-callback.html' + '?status=success&value=' + encodeURIComponent(connectionId) + '&state=' + encodeURIComponent(state), // echo the state you received },};That page tells the form that opened the popup how it went — the form only trusts messages coming from the very window it opened — then closes itself. Its query parameters: status (success or anything else, which counts as an error), value (becomes the field value), message (shown under the button on error), state (echo the one you received — required whenever your authorization URL carries a state: the form only accepts a completion that echoes a state it opened a popup for), plus any extra parameter you want an object field to receive (status, message and state are filtered out of object values). If the user closes the popup before reaching it, the flow counts as cancelled and the button is enabled again.
After an error the form reloads its definition, whatever onComplete says, keeping the values typed so far and the message under the button. Your callback has run by then and has spent the one-time state the authorization URL carried, leaving the URL behind the button unusable: the reload runs the preRenderProcess again, which starts a fresh flow, and the user can simply retry. Nothing is submitted, and if the reload itself fails the form stays as it was.
After connecting (onComplete).
none— the button turns into its connected state and the field holds the value; the user submits the form as usual, and your process receives the value with the rest of the parameters.submit— the form is submitted as soon as the account is connected, so the execution result’smessage,redirectornextProcessIdapply right away. In aui:stepsform this advances to the next step.reload— the form fetches its definition again, running thepreRenderProcess, so the server can check the connection and render the connected state (a different message, more fields, no connect button). Values already typed into other fields are kept. Because the server is the source of truth here, the form also reloads when the popup is closed without reaching the callback page.
Rendering the connected state. The button shows as connected whenever the field has a value, so a preRenderProcess that finds an existing connection can return the same oauth property with a default set to the connection id — the button then renders in its connected state (disabled) and the id travels with the submission like any other default. This is how a reload lands on the connected view without the callback message: the pre-render process checks the store and fills in the default. It is also the path for a returning user, and for a connection that finished after the popup was closed.
Variables Replacement in Form Definition
Section titled “Variables Replacement in Form Definition”Another powerful kind of personalization that Factorial Code Forms allow is variable replacement.
This allows defining variables that could differ in each form rendering. These variables are then replaced in the form definition using the mustache syntax.
Inside the additional options config, a variables node can be provided and would be used to replace tokens in all the definition schema, including titles, descriptions, default values, enums, etc.
Example of Variables for Content Customization
Section titled “Example of Variables for Content Customization”Let’s demonstrate how it works with an example. Suppose you want to implement an upgrade process, and depending on the new plan, you want to display the benefits.
Having these form schema:
{ "title": "Upgrade to {{newPlan}} plan", "description": "{{#benefits}}* {{.}}\n{{/benefits}}", "type": "object", "properties": { "email": { "title": "Your email", "type": "string", "format": "email" } }, "required": ["email"]}You could embed it with this approach and different plan configurations:
<div data-fcode-form-team="<fcode-team-slug>" data-fcode-form-process="<fcode-process-slug>" data-fcode-form-options='{ "variables": { "newPlan": "STARTER", "benefits": [ "Includes 15M Yeps / month", "Max 10 concurrent executions", "Up to 10 team members" ] } }'></div><div id="my-fcode-form"></div><script> Fcode.initForm("#my-fcode-form", { team: "<fcode-team-slug>", process: "<fcode-process-slug>", options: { variables: { newPlan: "STARTER", benefits: [ "Includes 15M Yeps / month", "Max 10 concurrent executions", "Up to 10 team members" ], }, }, });</script>import FcodeForm from "@factorialco/fcode-react-forms";
const MyComponent = () => { return ( <FcodeForm team={"<fcode-team-slug>"} processId={"<fcode-process-slug>"} options={{ variables: { newPlan: "STARTER", benefits: [ "Includes 15M Yeps / month", "Max 10 concurrent executions", "Up to 10 team members" ], }, }} /> );};$ref variables replacement
Section titled “$ref variables replacement”One more feature that opens up a world of posibilities is the $ref variables. With these replacement you can adapt your form schema in each embed situation, with a full replacement of some node of this schema.
Suppose you have an enumeration and you need to use different options in each form embed usage. That’s possible with variables:
Having this form schema:
{ "title": "Upgrade plan", "type": "object", "properties": { "newPlan": { "title": "Your new plan", "type": "string", "enum": { "$ref": "#/variables/availablePlans" } } }, "required": ["newPlan"]}You could embed it with this approach and different available plan configurations:
<div data-fcode-form-team="<fcode-team-slug>" data-fcode-form-process="<fcode-process-slug>" data-fcode-form-options='{ "variables": { "availablePlans": ["STARTER", "GROWTH"], } }'></div><div id="my-fcode-form"></div><script> Fcode.initForm("#my-fcode-form", { team: "<fcode-team-slug>", process: "<fcode-process-slug>", options: { variables: { availablePlans: ["STARTER", "GROWTH"], }, }, });</script>import FcodeForm from "@factorialco/fcode-react-forms";
const MyComponent = () => { return ( <FcodeForm team={"<fcode-team-slug>"} processId={"<fcode-process-slug>"} options={{ variables: { availablePlans: ["STARTER", "GROWTH"], }, }} /> );};Server-side pre-render (preRenderProcess)
Section titled “Server-side pre-render (preRenderProcess)”The variables above are supplied by the embedder or carried forward from a
previous step. When the values must be computed on the server before the form
is shown — a dropdown loaded from an API, config read from team variables — add
a preRenderProcess at the root of the form schema, set to the slug or id of a
process that returns a variables node:
{ "title": "Choose your team", "type": "object", "preRenderProcess": "load-team-options", "properties": { "factorial_team_id": { "$ref": "#/variables/factorialTeamField" } }, "required": ["factorial_team_id"]}When the form is opened, Factorial Code runs that process synchronously and
merges the variables it returns into the schema, so the $refs resolve to the
freshly-computed values. The process must return a variables object:
async function main() {  const { createFactorialClient } = fcode.import("factorial-sdk");  const teams = await createFactorialClient().teams.teams.all();
  return {    variables: {      factorialTeamField: {        title: "Factorial team",        type: "string",        oneOf: teams.map((t) => ({ const: String(t.id), title: t.name })),      },    },  };}
module.exports = { main };
This removes the need for a throwaway first step whose only job was to load data
and hand it forward. Because the pre-render runs before any user input, it can
only use data that needs none (reference collections, stored variables, config).
Any query-string parameters on the form URL are passed to the process as
fcode.context.parameters.
Because the form is served only once the pre-render finishes, opening it takes as
long as the process takes to run. While that happens the SDK shows a placeholder
of the form under a loading spinner — set
loadingContent to tell people what is being loaded. If
the process fails or times out, the form renders an error message instead and the
onError callback is called.
Internationalization
Section titled “Internationalization”Any visible text in a form schema can be translated. Write fcode.i18n("key") where the text
goes, and the platform replaces it with the translation before serving the schema — so the
browser receives a schema already written in one language.
The translations themselves live in your workspace’s locales, one YAML file per language. See Internationalization for how to write and manage them.
{ "title": "fcode.i18n(\"signup.title\")", "type": "object", "properties": { "name": { "title": "fcode.i18n(\"signup.name.label\")", "type": "string" }, "email": { "title": "fcode.i18n(\"signup.email.label\")", "type": "string", "format": "email", "ui": { "ui:placeholder": "fcode.i18n(\"signup.email.placeholder\")" } } }, "required": ["name", "email"], "embedFormOptions": { "loadingOverlayContent": "fcode.i18n(\"signup.overlay\")" }}With signup.title, signup.name.label and the rest defined in each locale:
# ensignup: title: "Signup form" name: label: "Your name" email: label: "Your email" placeholder: "You have to use a business email" overlay: "Creating new user..."Arguments are supported too, and fill in %{...} placeholders:
{ "description": "fcode.i18n(\"signup.email.help\", { max: \"120\" })" }Choosing the locale
Section titled “Choosing the locale”Pass locale in the additional options, or data-fcode-form-locale on the
container. It is sent to the platform as the Fcode-Locale header, and the schema is fetched again
when it changes.
<div data-fcode-form-team="<fcode-team-slug>" data-fcode-form-process="<fcode-process-slug>" data-fcode-form-locale="es"></div>import FcodeForm from "@factorialco/fcode-react-forms";
const MyComponent = () => { return ( <FcodeForm team={"<fcode-team-slug>"} processId={"<fcode-process-slug>"} options={{ locale: "es", }} /> );};When no locale is given, the workspace’s primary locale is used, and it is also the fallback for keys the chosen locale has not translated yet.
Customizing behaviour with functions
Section titled “Customizing behaviour with functions”Dynamic behaviour while the user fills the form — reformatting a value, or deriving one field from another — belongs in your own page, not in the form schema. A schema is served to every visitor of the form, so it cannot carry executable code.
Use the React onChange prop when you embed
@factorialco/fcode-react-forms, or the
fcode-forms-* events the SDK dispatches on document when you embed the
hosted script:
<script> document.addEventListener("fcode-forms-on-submit-success", (event) => { const { formId, formSubmittedData, processExecutionResult } = event.detail; analytics.track("User Registered", formSubmittedData); });</script>The events are fcode-forms-sdk-init, fcode-forms-init-form,
fcode-forms-on-submit-success, fcode-forms-on-next-step and
fcode-forms-on-submit-error. For submission results specifically, the
success, next-step and error callbacks
give you the same information as a direct callback.
Modal Window
Section titled “Modal Window”Factorial Code Forms can be shown in a modal window after the user clicks on some element. To achieve this, you only need to add all the form configuration to that element, and also include the data attribute data-fcode-form-modal. Here you have one example:
<button data-fcode-form-modal data-fcode-form-team="<fcode-team-slug>" data-fcode-form-process="<fcode-process-slug>">Open the form</button>